Show Posts

This section allows you to view all posts made by this member. Note that you can only see posts made in areas you currently have access to.


Topics - Son of the King

Pages: [1] 2 3 4
1
Stories and AARs / SotK's Short Stories
« on: January 06, 2018, 11:04:45 AM »
I'll start this thread with the complete version of the story I posted the first 7 sentences of in the 7 lines challenge thread. I'll probably add more stories in the future, as and when I convert them from ideas into something more coherent.


Viknar swung his pick. The sound echoed through the empty mine and almost seemed to add to the chill in the air. The others had begun refusing to come this deep once the unnatural cold had set in, but Viknar's dwarf blood could feel the valuable ore close by.

Viknar swung his pick. Stonetown needed him to find the ore. The economy was already suffering greatly after the old mine dried up, and Newdelve turning out to be a false hope would be more than the remaining miners could bear. They would move on, sapping yet more life out of the dwindling village.

Viknar swung his pick. Aldoric had promised to handsomely reward the miners once this excavation was a success. Land, power, riches, all potentially just behind the next piece of rock. The others' voices drifted down the tunnel; they had begun drinking already.

Viknar swung his pick. He liked ale just as much as the others, but the work was too important. He was afraid, just like the others, but he couldn't give in now. Why wouldn't they help? Why wouldn't they see?

Viknar swung his pick. One of the support beams creacked, and some dust fell into his beard. Viknar swung his pick. An icy breeze blew from somewhere. Viknar swung his pick. The sound changed; there was a hollowness to it.

Viknar swung his pick. The rock peeled away easily, exposing what looked like a stone wall. The tunnel grew colder than ever, and the breeze returned. Viknar paused, and steeled himself.

Viknar swung his pick. More rock fell away, there was definitely a wall. The stones were icy cold. Viknar thought about telling the others, but he could still faintly hear the sound of them drinking without him. Again.

Viknar swung his pick. The pick smashed straight through the cold stone, and pulling it out brought a good portion of the wall down. The breeze whistled through the hole, and a shiver went down Viknar's spine.

Viknar took his lamp and crept inside. He was in a long room, with a door at the far end. A dim glow was seeping through the gap around the door. In the centre of the room was a pedestal, almost as tall as Viknar. Each side wall had two alcoves, each housing a statue and what appeared to be a sarcophagus.

Viknar stepped forwards. He thought for a moment that he heard one of the others shout his name. The room became utterly silent and his breath hung in the air as mist.

The door exploded off its hinges. Viknar was thrown back out of the room, and into the wall of the mine. A blue flash, and everything was frozen. A shadow burst out of the room, and Viknar saw nothing else.

A support beam creaked and cracked, blocking the tunnel with splintered wood and rubble. The others sprinted towards the mine's opening in a drunken panic. An ice cold blast forced them onward, but only as soon as they could feel the sun, a shadow from behind caught them. Their limbs froze and the world went dark as the shadow drained the life from their bodies. More rubble fell, and the shadow passed on, out into the world beyond the mine.

2
yamlui - Declarative UI in pygame
Code is here on GitHub

Introduction

So, I've begun the process of making a thing that I had an idea for just over a year ago. One of the most convoluted parts of the unreleased python version of Township I did was the UI code. I had tried to generalise it, and mostly succeeded, but it was still a horror show. The 3d Township thing also ran out of steam because of no easy way to combine my existing code with some kind of easy UI layout tool.

So I decided to think about how I wanted to be able to define a UI. Most importantly, I wanted to not have to write much code to do it. Something that was great when I was first learning to program using Visual Basic was the ease of creating a UI by dragging elements onto a "form" and writing code that is run when events happen on those UI elements. It made it wonderfully easy to throw together a UI for something. This is much easier than the approach used by tkinter and pyqt (though Qt has a declarative thing called QML which is nice), which involves lots of wrangling UI elements in the code itself (so not really much of an improvement on the unreleased python Township I mentioned).

Another benefit of being able to describe a user interface in a configuration file is that it is then really easy for modders to change the UI as they see fit. One can customise as much as they like without having to actually rewrite any of the code.

The result of my thinking was a plan for yamlui. This would theoretically let me write a yaml file which defines everything about the user interface of a pygame application, from the size, colour, and positioning of things, to how they change (and what behaviour they should perform) when events happen, such as them being clicked on, or them being typed at.

Example

So the idea is that. So far, I've implemented only a few UI widgets, so its not even as functional as my old Township UI. However, it is all definable easily in a configuration file. Here is an example:

Code: [Select]
object: window
properties:
  text: Township Test UI
  image: examples/images/background.png
  width: 1280
  height: 800
children:
- object: container
  properties:
    opacity: 50%
    colour: [0, 0, 0]
    position: [10, 100]
    width: 625
    height: 600
  children:
  - object: label
    properties:
      text: World Settings
      width: 605
      font: arial
      font-size: 18
      position: [10, 10]
      display: relative
  - object: label
    properties:
      text: These options allow you to customise the settings used by the map generator when generating your world.
      width: 605
      font: arial
      font-size: 14
      font-colour: [175, 175, 175]
      position: [10, 50]
      display: relative
- object: container
  properties:
    opacity: 50%
    colour: [0, 0, 0]
    position: [645, 100]
    width: 625
    height: 600
  children:
  - object: label
    properties:
      text: Township Settings
      width: 605
      font: arial
      font-size: 18
      position: [10, 10]
      display: relative
  - object: label
    properties:
      text: These options allow you to customise the starting situation of your township's populace.
      width: 605
      font: arial
      font-size: 14
      font-colour: [175, 175, 175]
      position: [10, 50]
      display: relative

That file defines this UI:

Spoiler (click to show/hide)

The best part of that is that the only code I need to write outside of the yamlui library is this:

Code: [Select]
import pygame

import yamlui


pygame.init()

window = yamlui.generate_ui('examples/testui.yaml')

while True:
    for event in pygame.event.get():
        window.handle_event(event)
    window.update()
    window.draw()

Playing around

If this is of interest to anyone, it should be pretty easy for you to play around with. Just grab the latest version of yamlui from its GitHub page (there is a big green download button on the right), put the example code from this post in a script in the root directory (alongside the README and what-have-you) and run it with python.

It works with both python 2.7 and python 3.4 (probably other 3.x versions too, but I've only tested 3.4). If you're on Windows I'd recommend using python 3.4, since that makes it nice and easy to install pygame these days.

Assuming you installed python 3.4 on Windows, open a command prompt and run
Code: [Select]
C:\Python34\python.exe -m pip install -U pip
C:\Python34\python.exe -m pip install pygame pyyaml

to install the dependencies. You'll need to do this before you can successfully run the examples provided, obviously.

If you're on Linux (or probably OSX too) you can disregard the C:\Python34\python.exe -m bit of those commands.

I'll post/be cheerful in this thread when I implement cool new parts of it, like textboxes, and functional buttons.

3
The Welcome Hall - Start Here! / Welcome!
« on: January 27, 2015, 10:16:40 PM »
Welcome to Exilian! We're one of the friendliest communities on the internet, democratically run and existing to help facilitate a range of projects in fields including game modding/content creation, programming, drama, music, debating, writing, RPG and wargame design, e-learning, and more. You can also come here to chat, discuss the news, post poetry, play forum games, and just to meet a diverse range of people from all over the world.

Enjoy your stay!

4
Game & program tutorials / SotK's Oneshots One: Particles!
« on: January 26, 2015, 09:47:38 PM »
SotK's Oneshots One: Particles!

Welcome to SotK's Oneshots, a series of Python programming tutorials which will be spread across this area and the general Software Tutorials section depending on their content. They will all be "oneshots", that is each will be unrelated and a standalone guide. They will probably vary in length, and I intend for them to pass on some knowledge of programming techniques beyond their specific focus.

This first installment is called Particles!, and is unsurprisingly about particles. Specifically, particle systems in games. Particle systems have a number of uses, from making weather, through nice looking smoke to realistic hair. At the end of this tutorial, you should have a program that is a basic 2D simulation of snowfall. I'm posting this before the content is actually finished, since I like to live on the edge, and also so you can follow along with me, or take your own direction and see how our results differ.

You Will Need
  • Python (version shouldn't matter, I don't think I'm doing anything specific to 2.7 or 3.*. I am using python-2.7 if you want to be safe.)
  • Pygame - version should be the latest for your installation of Python

Instructions on how to get pygame are here. For Python, look here.

Step I - Create a window

The first thing we need is a window to display things in! This is covered in detail in my 6th Python tutorial, so here I'll just give you the code that results from that. If you want explanation of it, look in the aforementioned thread.

Code: (Step I) [Select]
import pygame

def run():
    # initialise pygame
    pygame.init()
    screen = pygame.display.set_mode((600, 600))
    pygame.display.set_caption('Hello, world!')
   
    # game loop
    running = True
    while running:
        # event loop
        for event in pygame.event.get():
            if event.type == pygame.QUIT:
                # Terminate on window closure
                running = False
            elif event.type == pygame.KEYUP and event.key == pygame.K_ESCAPE:
                # Terminate on Esc keypress
                running = False
   
        # drawing code
        screen.fill((0, 0, 0))
   
        pygame.display.flip()

if __name__ == '__main__':
    run()

Step II - Generate some particles

The next step is to display something on that screen! My 7th Python tutorial talks about displaying a box, but we don't really want to use shapes for this. The window (represented by the screen variable) is what pygame calls a "Surface". A surface is something which can be drawn or drawn on, and the screen surface is the window's main surface, anything drawn in it is displayed in the window (assuming its drawn within the window).

We want to draw particles on this Surface as small as we can. Luckily, pygame Surfaces have a method (more on the meaning of this later) called set_at, which allows us to set the colour of the pixel at a given coordinate.

Code: [Select]
screen.set_at(coordinate, colour)
In this call, colour is of the same form as in screen.fill. We want white pixels, since we're making "snow", so colour should be (255, 255, 255). The coordinate is the position of our particle. This is a pair of integers (can't have fractional numbers of pixels), which we can either decide on or randomly choose. Randomly choosing seems fun, and snow doesn't all start in one place!

Python has a module called random for just this purpose. random has a function called randint which generates a psuedo-random integer between two integers. Our screen has coordinates from 0 to 600 on both axes, and we don't want to spawn them right on the edge, so lets pick random numbers between 1 and 599. We'll also want to store all our particles so they don't disappear after one frame. We'll store them in a set. This is basically a representation of a mathematical set. It can only contain one instance of an item (i.e. if we try to put two of the same coordinates in, only one will end up stored). This is a minor optimisation at this point, to stop us drawing the same point multiple times per frame.

Code: [Select]
particles = set()
Code: [Select]
next_p = (random.randint(1, 599), random.randint(1, 599))
particles.add(next_p)

We also need to actually draw our particles. We do this by looping through the elements of the set and setting the colour at the correct pixel for each one.

Code: [Select]
for particle in particles:
    screen.set_at(particle, (255, 255, 255))

Lets put this together. We'll initialise the set before the game loop, add one particle each time, and draw all of them each frame.

Code: (Step II) [Select]
import random
import pygame

def run():
    # initialise pygame
    pygame.init()
    screen = pygame.display.set_mode((600, 600))
    pygame.display.set_caption('Hello, world!')
   
    # game loop
    particles = set()
    running = True
    while running:
        # event loop
        for event in pygame.event.get():
            if event.type == pygame.QUIT:
                # Terminate on window closure
                running = False
            elif event.type == pygame.KEYUP and event.key == pygame.K_ESCAPE:
                # Terminate on Esc keypress
                running = False

        next_p = (random.randint(1, 599), random.randint(1, 599))
        particles.add(next_p)
        # drawing code
        screen.fill((0, 0, 0))
        for particle in particles:
            screen.set_at(particle, (255, 255, 255))
   
        pygame.display.flip()

if __name__ == '__main__':
    run()

Step III - Monte Carlo

That creates us a nice screen full of particles. However they are a square shape. This might not be bad, but circles are nicer. How do you get your random numbers to produce particles in a circle?

We will use a technique called Monte Carlo randomisation to generate our coordinates inside a circle. This is based on the fact that the equation of a circle is:

(x - a)2 + (y - b)2 = r2

For the "unit circle" - that is, a circle at the origin with radius 1 - this simplifies to:

x2 + y2 = 1

Therefore, if we want a point inside this circle, we just need to pick x and y such that:

x2 + y2 <= 1

That sounds like a while loop to me!

Code: [Select]
def monte_carlo():
    randx = 2
    randy = 2
    while (randx * randx) + (randy * randy) > 1:
        random.seed()
        randx = random.uniform(1, -1)
        randy = random.uniform(1, -1)
    return [randx, randy]

random.uniform(a, b) creates a random number between a and b. random.seed() resets the random seed used to generate the numbers, calling it each time marginally improves the randomness. This is a brute force way to get random numbers for the x and y values within the unit circle, but its not slow enough to be a problem this point.

Now lets modify our particle creation code to use this function.

Code: [Select]
point = monte_carlo()
next_p = (int((200*point[0]) + 300), int((200*point[1]) + 300))
particles.add(next_p)

The second line in that snippet looks ugly, so lets break it down. It takes the point in the unit circle returned by monte_carlo(), then scales it up by a factor of 200 (this gives values between -200 and 200) and translates it by (300, 300) (this moves them such that the values are relative to the centre of the window). Finally, the x and y values are being cast to integers. They are floats (decimals) when returned by monte_carlo(), and we need them to be integers to use them with set_at.

Lets see the finished code at this point:

Code: (Step III) [Select]
import math
import random
import pygame

def monte_carlo():
    randx = 2
    randy = 2
    while (randx * randx) + (randy * randy) > 1:
        random.seed()
        randx = random.uniform(1, -1)
        randy = random.uniform(1, -1)
    return [randx, randy]

def run():
    # initialise pygame
    pygame.init()
    screen = pygame.display.set_mode((600, 600))
    pygame.display.set_caption('Hello, world!')
   
    # game loop
    particles = set()
    running = True
    while running:
        # event loop
        for event in pygame.event.get():
            if event.type == pygame.QUIT:
                # Terminate on window closure
                running = False
            elif event.type == pygame.KEYUP and event.key == pygame.K_ESCAPE:
                # Terminate on Esc keypress
                running = False

        point = monte_carlo()
        next_p = (int((200*point[0]) + 300), int((200*point[1]) + 300))
        particles.add(next_p)
        # drawing code
        screen.fill((0, 0, 0))
        for particle in particles:
            screen.set_at(particle, (255, 255, 255))
   
        pygame.display.flip()

if __name__ == '__main__':
    run()

Step IV - Tidying up

That horrible line did three different things and was hard to understand, so lets split it up. When programming, its a good idea to keep things as simple as possible so that someone with no knowledge of your code can understand it easily. This is achieved in part by naming your variables and functions sensibly, partly by useful comments (the code in this tutorial does not contain useful comments at this point), and partly by keeping your functions small and atomic (one function serves one purpose). Lets write three functions to do the different parts of that line:

Code: [Select]
def scale(point, sf):
    return (point[0] * sf, point[1] * sf)

def translate(point, dx, dy):
    return (point[0] + dx, point[1] + dy)

def make_int(point):
    return (int(point[0]), int(point[1]))

These are pretty self explanatory, what they do is obvious from looking, and was explained above :) . Now lets use them to replace the ugly line:
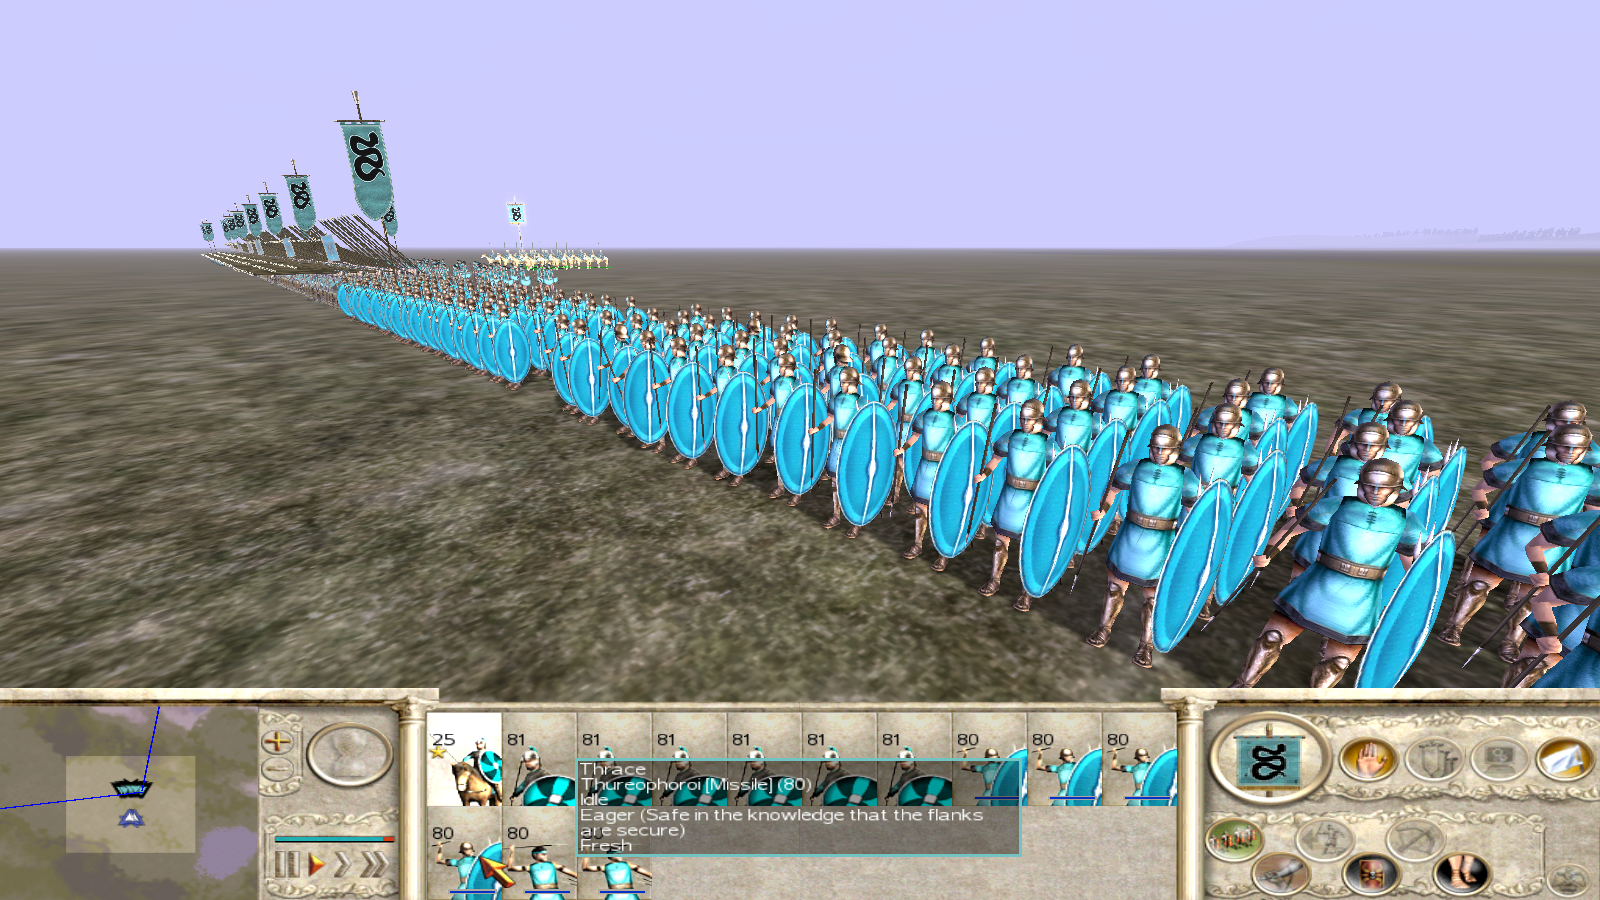
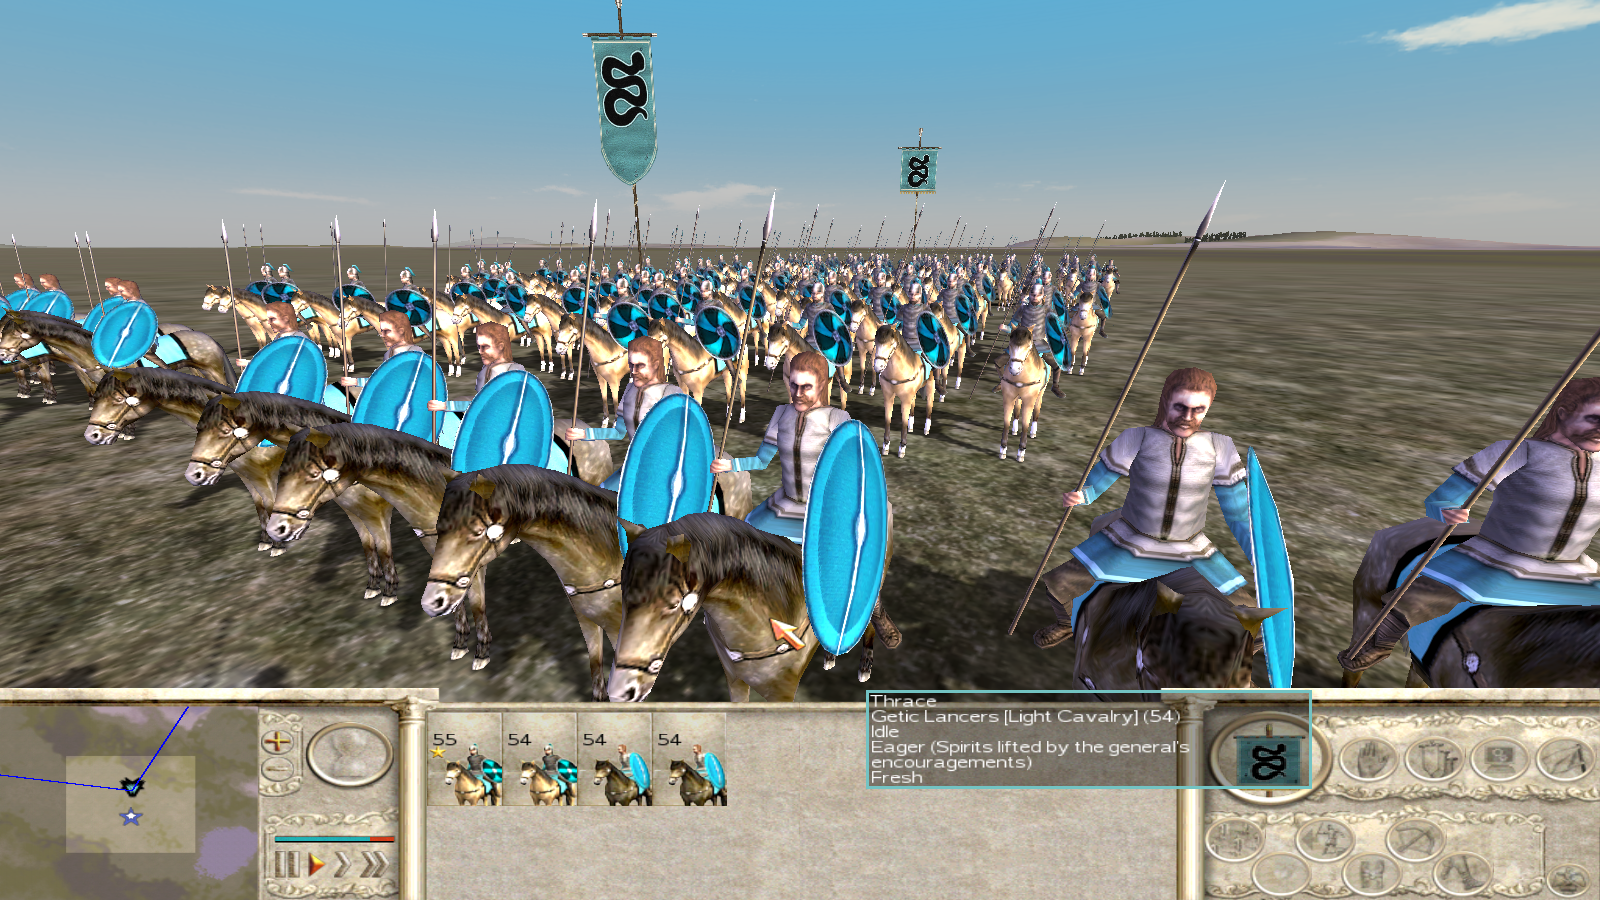
Code: [Select]
next_p = make_int(translate(scale(point, 50), 300, 300))
We could simplify this further by replacing point with monte_carlo(), but we'll be moving this code soon so this will do for now. The code at this stage should look something like this:

Code: (Step IV) [Select]
import math
import random
import pygame

def monte_carlo():
    randx = 2
    randy = 2
    while (randx * randx) + (randy * randy) > 1:
        random.seed()
        randx = random.uniform(1, -1)
        randy = random.uniform(1, -1)
    return [randx, randy]

def scale(point, sf):
    return (point[0] * sf, point[1] * sf)

def translate(point, dx, dy):
    return (point[0] + dx, point[1] + dy)

def make_int(point):
    return (int(point[0]), int(point[1]))

def run():
    # initialise pygame
    pygame.init()
    screen = pygame.display.set_mode((600, 600))
    pygame.display.set_caption('Hello, world!')
   
    # game loop
    particles = set()
    running = True
    while running:
        # event loop
        for event in pygame.event.get():
            if event.type == pygame.QUIT:
                # Terminate on window closure
                running = False
            elif event.type == pygame.KEYUP and event.key == pygame.K_ESCAPE:
                # Terminate on Esc keypress
                running = False

        point = monte_carlo()
        next_p = make_int(translate(scale(point, 50), 300, 300))
        particles.add(next_p)
        # drawing code
        screen.fill((0, 0, 0))
        for particle in particles:
            screen.set_at(particle, (255, 255, 255))
   
        pygame.display.flip()

if __name__ == '__main__':
    run()

Step V - Getting older

OK, we're generating particles forever, and none of them are disappearing. This is Not GoodTM. We will eventually run out of memory and crash (actually the spawning area would end up entirely white and we'd stop adding particles since we use a set not a list, but if your spawning area is big enough you will cause a crash). Lets make our particles age. You will want aging particles so you can keep a lid on them nicely. If you randomly generate a lifespan for them, some disappearing and others appearing should seem nice and constant.

We're going to need to be able to store more than one piece of information about each particle now (the age and the position). Lets store them as dictionaries rather than just a coordinate. We could go all object oriented on this, but we'll save that for later :) .

Code: [Select]
def add_particle(particles):
    particle = {
        'name': 'snow',
        'age': 0,
        'position': make_int(translate(scale(monte_carlo(), 50), 300, 300)),
        'colour': (255, 255, 255)
    }
    particles.append(particle)

Here we add a function which creates a particle. Note we are using particles.append now, rather than particles.add. This is because we need to change particles from a set to a list. This is a downside of using a dictionary to represent a particle - dictionaries are not "hashable types" in Python, and items in a set must be "hashable" (hashable means that the object can be converted to a unique string which can then be converted back into the object).

The add_particle function is again pretty self-explanatory. We set the variable particle to be a dictionary containing 4 keys. These keys are 'name', 'age', 'position', and 'colour'. Each of these keys has a "value" - in the case of 'name', the value is 'snow'. Notice the value of 'position' - that is the ugly next_p line which we neatened. I told you we'd move that code soon!

Now we should utilise this code in our main loop. First, our particle adding code is replaced by a single function call:

Code: [Select]
add_particle(particles)
Next, lets increment the age each frame and remove any particles that get too old from the list:

Code: [Select]
particle['age'] += 1
if particle['age'] > 1000:
    particles.remove(particle)

We'll put that in the for loop we use for set_at. particle['age'] gets the value stored in the dictionary stored in particle with the key 'age'.

I said that you should make the lifespan random, but in this case it looks fine with a fixed lifespan. As each particle is created one frame after the last, there is a steady flow of particles disappearing and appearing. The code now looks like this:

Code: (Step V) [Select]
import math
import random
import pygame

def monte_carlo():
    randx = 2
    randy = 2
    while (randx * randx) + (randy * randy) > 1:
        random.seed()
        randx = random.uniform(1, -1)
        randy = random.uniform(1, -1)
    return [randx, randy]

def scale(point, sf):
    return (point[0] * sf, point[1] * sf)

def translate(point, dx, dy):
    return (point[0] + dx, point[1] + dy)

def make_int(point):
    return (int(point[0]), int(point[1]))

def add_particle(particles):
    particle = {
        'name': 'snow',
        'age': 0,
        'position': make_int(translate(scale(monte_carlo(), 50), 300, 300)),
        'colour': (255, 255, 255)
    }
    particles.append(particle)

def run():
    # initialise pygame
    pygame.init()
    screen = pygame.display.set_mode((600, 600))
    pygame.display.set_caption('Hello, world!')
   
    # game loop
    particles = []
    running = True
    while running:
        # event loop
        for event in pygame.event.get():
            if event.type == pygame.QUIT:
                # Terminate on window closure
                running = False
            elif event.type == pygame.KEYUP and event.key == pygame.K_ESCAPE:
                # Terminate on Esc keypress
                running = False

        add_particle(particles)

        # drawing code
        screen.fill((0, 0, 0))
        for particle in particles:
            particle['age'] += 1
            if particle['age'] > 1000:
                particles.remove(particle)
            screen.set_at(particle['position'], particle['colour'])
   
        pygame.display.flip()

if __name__ == '__main__':
    run()

Step VI - Getting moving

We now have an easy way to add information to our particles, we can simply add to the dictionary created when we generate them! Lets get our particles moving around the screen a bit, they're boring stood still.

Code: [Select]
def add_particle(particles):
    particle = {
        'name': 'snow',
        'age': 0,
        'lifespan': random.randint(1, 1000),
        'position': round_to_int(translate(scale(monte_carlo(), 100), 300, 300)),
        'velocity': monte_carlo(),
        'colour': (255, 255, 255)
    }
    particles.append(particle)

We have added a 'velocity' key to the dictionary (also a 'lifespan' one, I decided to make it random anyway). This uses our monte_carlo() function from earlier to get two values inside the unit circle. Note that make_int has changed to round_to_int. I learnt something writing this, casting to int in Python truncates the number rather than rounding (so 3.6 gets turned into 3 not 4). Here is the round_to_int function:

Code: [Select]
def round_to_int(point):
    return [int(round(point[0], 0)), int(round(point[1], 0))]

round(number, decimal_places) is being used here. This does proper rounding, not truncation.

Now we want to make our particles understand the velocity they have.

Code: [Select]
particle['position'][0] += particle['velocity'][0]
particle['position'][1] += particle['velocity'][1]

We'll put this in the place where we deal with removing our particles, in the for loop. However, it won't work yet since the position + the velocity will be a float not an int, and therefore can't be used when we set pixels. We'll need to turn it into a pair of integers. Lucky we have a function for that eh?

Code: [Select]
particle['display_position'] = round_to_int(particle['position'])
screen.set_at(particle['display_position'], particle['colour'])

We're growing a lot of code in this for loop now. Remembering what I said about simplifying code, lets make an update_particle function.

Code: [Select]
def update_particle(particle, particles):
    particle['age'] += 1
    if particle['age'] > particle['lifespan']:
        particles.remove(particle)
    particle['position'][0] += particle['velocity'][0]
    particle['position'][1] += particle['velocity'][1]
    particle['display_position'] = round_to_int(particle['position'])

This is just the code that was in that for loop. We can now replace that with a single function call:

Code: [Select]
update_particle(particle, particles)
Easy! The code should now look like this:

Code: (Step VI) [Select]
import math
import random
import pygame

def monte_carlo():
    randx = 2
    randy = 2
    while (randx * randx) + (randy * randy) > 1:
        random.seed()
        randx = random.uniform(1, -1)
        randy = random.uniform(1, -1)
    return [randx, randy]

def scale(point, sf):
    return (point[0] * sf, point[1] * sf)

def translate(point, dx, dy):
    return (point[0] + dx, point[1] + dy)

def round_to_int(point):
    return [int(round(point[0], 0)), int(round(point[1], 0))]

def add_particle(particles):
    particle = {
        'name': 'snow',
        'age': 0,
        'lifespan': random.randint(1, 1000),
        'position': round_to_int(translate(scale(monte_carlo(), 100), 300, 300)),
        'velocity': monte_carlo(),
        'colour': (255, 255, 255)
    }
    particles.append(particle)

def update_particle(particle, particles):
    particle['age'] += 1
    if particle['age'] > particle['lifespan']:
        particles.remove(particle)
    particle['position'][0] += particle['velocity'][0]
    particle['position'][1] += particle['velocity'][1]
    particle['display_position'] = round_to_int(particle['position'])

def run():
    # initialise pygame
    pygame.init()
    screen = pygame.display.set_mode((600, 600))
    pygame.display.set_caption('Hello, world!')
   
    # game loop
    particles = []
    running = True
    while running:
        # event loop
        for event in pygame.event.get():
            if event.type == pygame.QUIT:
                # Terminate on window closure
                running = False
            elif event.type == pygame.KEYUP and event.key == pygame.K_ESCAPE:
                # Terminate on Esc keypress
                running = False

        add_particle(particles)

        # drawing code
        screen.fill((0, 0, 0))
        for particle in particles:
            update_particle(particle, particles)
            screen.set_at(particle['display_position'], particle['colour'])
   
        pygame.display.flip()

if __name__ == '__main__':
    run()

Coming soon
  • Acceleration due to gravity
  • Making things configurable
  • Snow falls from more than one place really
  • The floor is dry, why not stick?

5
Finished/Dead Mafias and RPGs / Council of Venarta Mafia - Game Thread
« on: December 29, 2014, 11:36:09 PM »
Welcome to the 5th Council of Venarta in the year 348
It is now day. Night will begin at 1800 GMT on 9th January.

Only a few months ago, this council was much larger, around 30 people would have been sat here. However, they have all died unexplained deaths, disappeared, or otherwise been removed from your number. Coincidence and outside motives have been considered and discounted, it must now be assumed that these removals are being orchestrated by someone (or some group) within the council itself. The council is currently leaderless, but due to the unfortunate circumstances currently, the election has been postponed until the plotters are found.

Killing during a council session is unheard of and would probably cause an outcry among the Lesser Representatives
[1], so you should probably try to stick to imprisoning each other [in reality this will just be flavour for the "lynches"]. While they have no real power, you must be quick to show that you still do. If someone shows that the council can be outmanoeuvred and eliminated, they all might try to take power! Surely now is the last chance to stop whoever is carrying out these acts; that you are all gathered here to solve it will make it easy for them to kill you if they wish.

[1]: The Lesser Representatives are a much larger council with a representative from each town in the Venartan Republic sent to discuss policies. They are supposed to be able to influence the discussions and decisions of the Council, but in reality they talk and the Council largely just ignores them.

Day 1
The council entered the chambers for the first day's discussion one by one. The tension in the air was palpable, each knew this could be their last day as a council member, perhaps even their last day alive. When everyone was present the debates of what to do about this crisis, and who to do it to could begin.

Procedures/Rules
Shamelessly ripped from assorted people

If you break one of these rules, you will be either warned, replaced, or modkilled, depending on which rule it is and the severity.

The game will follow the usual day-night sequence. We will start with a day so that no-one is dead before the game starts.
  • Dead players do not speak. Giving away any information after death will not be tolerated.
  • Be bold with voting. A vote that isn't in bold won't be counted.
  • Lynches require a majority of votes. Once a player has reached the majority, his/her pleas are useless and any attempts to unvote will be ignored. You may also vote for no lynch.
  • NO EDITING YOUR POSTS.
  • Do not post often during the night. A little small talk is allowed to keep the thread bumped, but keep night posting to a minimum. Do not reveal any important game information.
  • Once your death scene has been posted, stop posting. You can make a farewell post or two, but no discussion of the game.
  • No communication with other players outside this thread unless I say it is permitted in your role email. This excludes mafia.

Current Players

PlayerStateRole
JubalAlive-
comrade_generalAlive-
The KhanAlive-
Dripping DAlive-
ColossusAlive-
OthkoAlive-
Mother of DragonsAlive-

6
OK, I want to run a mafia. I think we need a mafia here.

It will be a basic 5/2 setup unless we get more people than that. State your interest here!

I will write some setting here later if people would like that.

Currently in:
  • Jubal
  • CG
  • The Khan
  • DD
  • Colossus
  • Othko
  • Mother of Dragons

7
C++ / Welcome: Say Hello
« on: May 15, 2014, 08:34:13 PM »
Hey all of you!

I am SotK, or Adam. I'm a programmer who works for a company called Codethink in Manchester. I have a degree in Computer Science with Mathematics from Leeds University, and in my free time I play video games, program random things and a game called Township, and spend time with my wonderful fiancée Mother of Dragons. For my final year project at uni I generalised the scan conversion algorithm for rasterizing shapes to n dimensions, something that had never been done before!

So, who are you? What have you done with your lives so far? What do you know about programming?

8
C++ / Welcome: Course Info
« on: May 15, 2014, 08:21:43 PM »
Introduction to Programming in C++

This course will teach you the basics of programming in C++. It is designed to give a good foundation in the basics of both programming in general and more specifically in C++. In addition to the basic stuff, the course touches upon stuff towards the end that shows the range of things that can be done once the groundwork is laid.

Sections:
  • Setting Stuff Up:
    • Getting and installing a compiler
    • Installing Qt Creator
  • Programming 101:
    • Making things happen
    • Doing some maths
    • Logic!
  • Arrays and Vectors:
    This section is a little more specific to C++, the things learnt in section 2 apply very easily to any language.
    • Arrays
    • Vectors
    • Pointers and other delights of C++
  • File Handling:
    • Reading from files
    • Writing to files
  • Quick Introduction to Object Oriented Programming:
    • Classes
    • Inheritance
    • Getting abstract
  • User Interfaces:
    • Introduction to Qt
    • Making things happen again
    • Interaction
    • Linking it with the rest
  • Basic Graphics:
    Only 2D graphics in this course.
    • Drawing blobs
    • Drawing lines
    • Between the lines
    • Curves

Details:

Requirements:
  • A computer that can run Qt Creator
  • Basic mathematical knowledge (geometry in particular) would be beneficial
  • Some programming experience would also be beneficial, if only because it will make the beginning parts of the course easier
Max credits: 7

Students:
  • Othko

We'll be starting soon!

9
SotK's Python Tutorials
Part 7: More Pygame


Introduction:

Last time, we made a window open on the screen. Its not a lot, but its the basis of anything with pygame (obviously). By the end of this tutorial we will have made a box on the screen, and been able to move it around with WASD! This is clearly a basis upon which a simple game can be built.

Township started out similar to this, I had an assignment to create something with dynamic graphics using pygame, and was devoid of inspiration so made a bunch of spheres chase each other around the screen and got an idea from there.

Representing a box:

At the end of the last tutorial we had the following, which opened a window and coloured it black.

Code: [Select]
# import pygame modules
import pygame

# initialise pygame
pygame.init()
screen = pygame.display.set_mode((600, 600))
pygame.display.set_caption('Hello, world!')

# game loop
running = True
while running:
    # event loop
    for event in pygame.event.get():
        if event.type == pygame.QUIT:
            # Terminate on window closure
            running = False
        elif event.type == pygame.KEYUP and event.key == pygame.K_ESCAPE:
            # Terminate on Esc keypress
            self.running = False

    # drawing code
    screen.fill((0, 0, 0))

    pygame.display.flip()

We want to have a box at a position on this window. Lets say [295, 295] as that will but the box in the centre of the window. This position is the top-left corner of the box. It will be a good idea to store this position in a variable, so that we can modify the position easily. Since in the future we will want to make this box move, it will be a good idea to have a variable to represent its speed too. We are working in 2D, so we'll make the speed a two-element list of the form (horizontal speed, vertical speed). For now this can be [0, 0]. Our box could also use a height and width, so we'll make those too, a square of edge length 10 pixels. We'll also want a colour for the box to be, in this case we'll choose white (or (255, 255, 255)).

Note we use lists for the position and the speed so that we can change them later on.

Finally, we will need to make a "Rect" object, which is pygame's representation of a rectangular shape.

Code: [Select]
# import pygame modules
import pygame

# initialise pygame
pygame.init()
screen = pygame.display.set_mode((600, 600))
pygame.display.set_caption('Hello, world!')

# set up box stuff
box_pos = [295, 295]
box_speed = [0, 0]
box_height = 10
box_width = 10
box_colour = (255, 255, 255)
box = pygame.Rect(box_pos, (box_width, box_height))

# game loop
running = True
while running:
    # event loop
    for event in pygame.event.get():
        if event.type == pygame.QUIT:
            # Terminate on window closure
            running = False
        elif event.type == pygame.KEYUP and event.key == pygame.K_ESCAPE:
            # Terminate on Esc keypress
            self.running = False

    # drawing code
    screen.fill((0, 0, 0))

    pygame.display.flip()

That is all the data we need to draw the box, and potentially move it in the future, so on to drawing!

Drawing the box:

Clearly, the drawing code for our example is at the end of the loop. We want to draw the box after filling the screen in black (otherwise our box will be drawn "underneath" the black of the screen). Imagine you are painting a picture, so the things nearest the front need to be drawn last.

Drawing a rectangle in pygame is simple. We use the function pygame.draw.rect(), which takes a surface (the screen), the colour of the rectangle and the Rect object to draw.

Code: [Select]
# import pygame modules
import pygame

# initialise pygame
pygame.init()
screen = pygame.display.set_mode((600, 600))
pygame.display.set_caption('Hello, world!')

# set up box stuff
box_pos = [295, 295]
box_speed = [0, 0]
box_height = 10
box_width = 10
box_colour = (255, 255, 255)
box = pygame.Rect(box_pos, (box_width, box_height))

# game loop
running = True
while running:
    # event loop
    for event in pygame.event.get():
        if event.type == pygame.QUIT:
            # Terminate on window closure
            running = False
        elif event.type == pygame.KEYUP and event.key == pygame.K_ESCAPE:
            # Terminate on Esc keypress
            self.running = False

    # drawing code
    screen.fill((0, 0, 0))

    pygame.draw.rect(screen, box_colour, box)

    pygame.display.flip()

Now, there is a box in the middle of the screen!

Moving the box:

Great, there is a box, but it doesn't do a lot. Lets make that box move around!

In the last tutorial I mentioned the pygame.KEYUP event. There is an opposite event, pygame.KEYDOWN. We will use these to make the WASD keys make the box move. When a key is pressed down, we need to check which one is pressed and change the speed of the box accordingly. When the key goes up again we need to put the speed back to 0 in the relevant direction. The vert_keys and hori_keys tuples store the vertical and horizontal keys to make the checking nicer for when the key goes up.

Code: [Select]
vert_keys = (pygame.K_w, pygame.K_s)
hori_keys = (pygame.K_a, pygame.K_s)
if event.type == pygame.KEYDOWN:
    if event.key == pygame.K_w:
        box_speed[1] = -1
    if event.key == pygame.K_s:
        box_speed[1] = 1
    if event.key == pygame.K_a:
        box_speed[0] = -1
    if event.key == pygame.K_d:
        box_speed[0] = 1
elif event.type == pygame.KEYUP:
    if event.key in vert_keys:
        box_speed[1] = 0
    if event.key in hori_keys:
        box_speed[0] = 0

We now integrate this into the event loop of our main program. We should also make the position of the box change so that we can see an effect. We will need to move our definition of the Rect object into the loop since it takes the position as a parameter.

Code: [Select]
# import pygame modules
import pygame

# initialise pygame
pygame.init()
screen = pygame.display.set_mode((600, 600))
pygame.display.set_caption('Hello, world!')

# set up box stuff
box_pos = [295, 295]
box_speed = [0, 0]
box_height = 10
box_width = 10
box_colour = (255, 255, 255)

vert_keys = (pygame.K_w, pygame.K_s)
hori_keys = (pygame.K_a, pygame.K_d)

# game loop
running = True
while running:
    # event loop
    for event in pygame.event.get():
        if event.type == pygame.QUIT:
            running = False
        elif event.type == pygame.KEYDOWN:
            if event.key == pygame.K_w:
                box_speed[1] = -1
            if event.key == pygame.K_s:
                box_speed[1] = 1
            if event.key == pygame.K_a:
                box_speed[0] = -1
            if event.key == pygame.K_d:
                box_speed[0] = 1
        elif event.type == pygame.KEYUP:
            if event.key in vert_keys:
                box_speed[1] = 0
            if event.key in hori_keys:
                box_speed[0] = 0
            if event.key == pygame.K_ESCAPE:
                running = False

    # update box
    box_pos[0] += box_speed[0]
    box_pos[1] += box_speed[1]

    # drawing code
    screen.fill((0, 0, 0))

    # draw box
    box = pygame.Rect(box_pos, (box_width, box_height))
    pygame.draw.rect(screen, box_colour, box)

    pygame.display.flip()

Now the box will move when you press the WASD keys! It moves fast, so be careful.

Next time I will talk about how we can use classes to make this code neater.

10
Arts, Crafts, Music & Drama - The Artisans' Guilds / SotK's Maps
« on: December 30, 2013, 04:54:04 PM »
In this thread I'll post the maps I make to visualise the fantasy world/continent I've been working on intermittently for some time now.

First up is Isla Venarta in the Early Venartan Era. This is the island that the Venartan refugees landed upon after fleeing their homeland following the as yet unnamed calamity caused by stuff. From here they built an empire spanning a good portion of the continent of Alatra.

Spoiler (click to show/hide)

11
Township / Screenshots
« on: December 09, 2013, 11:15:46 AM »
Latest Screenshot:

Spoiler (click to show/hide)

This screenshot shows the newly implemented trees. This is the kind of area that would be ideal to found a township. Plenty of wood nearby, and fairly defensible due to the thinness of the land. Its also quite flat.

Previous Screenshots:

Spoiler (click to show/hide)

12
Township / What to expect? (Next Release Preview)
« on: December 05, 2013, 06:49:45 PM »
The next release will be: Township pre-alpha 0.3

The last release was: Township pre-alpha 0.2

The Key Points
  • 0.2 required Python 3.x, this will work with either Python 2.7 or Python 3.4.
  • There will be maps of "unlimited" size.
  • It will be released once I have the basic map functionality fully implemented as a "tech demo" type thing.
  • There will also be an executable and installer for folk who don't want to battle with installing Python and all the required libraries.
Feature List
  • User interface for playing the game, rather than the old "only hotkeys" nightmare.
  • Infinite, 2D, map to build your townships.
  • Trees and stone scattered around the world, with stone common in higher areas and trees mostly gathered in the lowlands.
  • Villagers with a number of attributes that affect their ability to perform jobs in your township.
  • Monsters who roam the world, some which seek out your township and others who are passive unless disturbed.

13
General Chatter - The Boozer / Tequila Leeds petition - Please sign!
« on: October 10, 2013, 06:52:10 PM »
Could everyone please sign this petition in the interest of equality, and in general, of all that is right?

The advertising campaign associated with this petition is disgusting. Rape should never be treated lightheartedly, let alone be apparently condoned, or even incited.

The petition is here.

Thank you all.

SotK and MoD

14
SotK's Python Tutorials
Part 6: Introduction to Pygame


What is Pygame?

Pygame is one method of creating a user interface in Python. It is used when you are aiming to make a game, which is the direction we are going to take with these tutorials. You can get Pygame from here. If you're on Windows you'll want "pygame-1.9.2a0.win32-py3.2.msi".

Pygame provides simple methods for drawing things into a window on screen, as well as support for sound and video.

Initialisation:

The first thing we need to do is import the pygame module. At the very top of your program, type import pygame to do this. With the module imported, we can use pygame's functionality. The following code will get us ready to make a window for you to draw things on!

Code: [Select]
pygame.init()
screen = pygame.display.set_mode((600, 600))
pygame.display.set_caption('Hello, world!')

The first line initialises pygame, and must be called before any other pygame functionality is used in your program. The second line creates a variable called screen. This is a 600 x 600 "Surface". A surface is basically an image that can be drawn to the monitor. screen will be our main surface, and the rest of our program will eventually be drawn on top of it. The third line sets the caption at the top of the window to be Hello, world!.

The next step to creating our blank window is to make an infinite loop, as we did in the last tutorial. This will be our game loop and will be where all of the functionality in the game is implemented. to do this we simply make a boolean variable, and use a while loop to create infinite repetition:

Code: [Select]
running = True
while running:
    # do stuff

Events:

We will also need a way to get out of this loop, so that we aren't stuck with an unresponsive program. To do this we will use another piece of functionality provided to us by pygame; the event loop.

Code: [Select]
for event in pygame.event.get():
    if event.type == pygame.QUIT:
        # Terminate on window closure
        running = False

pygame.event.get() returns a list of events that have occurred since the last time it was called, such as mouse movement, key presses, the close button being clicked, etc. This example is created when the close button is clicked. It is pretty much the same idea as the quit command we had in the calculator in the last tutorial. As an example, here is the code to close the program when the escape key is pressed:

Code: [Select]
elif event.type == pygame.KEYUP and event.key == pygame.K_ESCAPE:
    # Terminate on Esc keypress
    self.running = False

As you can see here, events involving key presses have an attribute key, which you can use to determine which key was pressed. In a later tutorial we will use this to let us control things with the arrow keys. The pygame.KEYUP event occurs when a key is released. Similarly, pygame.KEYDOWN occurs when a key is pressed down.

Drawing:

Now we can keep our program running for as long as we want, its time to learn how to actually draw something on the screen. We'll start just by filling the screen with a colour:

Code: [Select]
screen.fill((0, 0, 0))

This will fill the window with black. This is a good place to start as it is the simplest method of drawing things available to us. We could just create a number of surfaces of different sizes and colours to represent different things in our game.

Once all your drawing code has executed, you will need to 'flip' the display. This will update all your changes made by drawing and show them on screen. This is equivalent to swapping buffers when using OpenGL, which I will go into at a later date.

Code: [Select]
pygame.display.flip()

Putting it together:

Now we know all the different elements we need to open a (600 x 600) pygame window on our screen, lets go ahead and do it. First we import pygame, then initialise it and set up the screen surface. Then we need our game loop, which will contain both the pygame event loop and our drawing code. This means that each frame consists of one pass through the game loop.

Code: [Select]
# import pygame modules
import pygame

# initialise pygame
pygame.init()
screen = pygame.display.set_mode((600, 600))
pygame.display.set_caption('Hello, world!')

# game loop
running = True
while running:
    # event loop
    for event in pygame.event.get():
        if event.type == pygame.QUIT:
            # Terminate on window closure
            running = False
        elif event.type == pygame.KEYUP and event.key == pygame.K_ESCAPE:
            # Terminate on Esc keypress
            self.running = False

    # drawing code
    screen.fill((0, 0, 0))

    pygame.display.flip()

Next time we will put something on this display, and have a little bit of user interaction!

15
The Great Forum - Rome II Discussion / Total War: Rome II
« on: July 02, 2012, 04:00:58 PM »
So yeah, Rome 2 was announced today!

Use this thread to discuss/explode with excitement. ;D

Check out this article for screenshots, concept art and information.

Pages: [1] 2 3 4